Margins, Splits and Merges
Let’s start our foray into cropping by taking a look at our tools for creating margins, splitting cropping areas, and merging them.
The next video will cover these functions.
But before you start watching, there is one crucial thing to remember.
When we are splitting or merging, we are doing this to cropping areas, not field boundaries. Fundamentally, the field boundaries are not changing, just the areas we are cropping within them.
With that in mind, let’s get to the video.
Adding and Editing Cropping
Now that we’re happy that our cropping areas are accurate, we can start to think about updating the cropping itself.
The video below covers updating crops, and how to edit any existing crops.
It also details how to update multiple fields simultaneously, which is a massive time saver!
Adding SFI Information to Omnia
If you are in a SFI agreement, then it is a good idea to add this information to Omnia.
The nature of the scheme means that there are a mix of rotational and crop management options, and so there are slightly different ways of recording each of these.
So, let’s go over how to bring this information in to Omnia.
The video below leads you through these recording options.
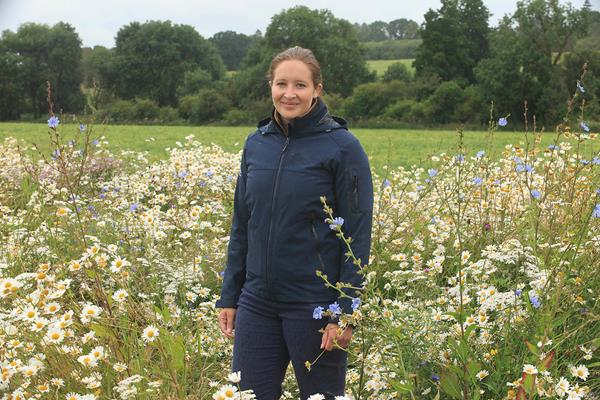
Here is what Georgina Wallis, Head of Environmental Services at Hutchinsons, has to say about SFI Management in Omnia:
“Adding SFI actions into Omnia is a simple process which allows for the alignment of SFI with the wider rotation plan on farm. Omnia is the only platform which integrates SFI and other agri-environment schemes into practical on farm management. By ensuring that SFI actions are mapped into Omnia, you are able to maintain consistent records of actions and their objectives, both using Omnia and the Scout App. This makes any potential inspections from the Rural Payment Agency simpler and more efficient.”
If you have are seeking support on the SFI and other agri-environment schemes, then you can contact Georgina and the Environmental Services team via enviro@hlhltd.co.uk
Top Tips - Cropping and Margins

When is the right time to add a margin?
Margins can only be added in the current cropping year.
This is to prevent retrospective and unintended changes to cropping areas, which would compromise previously created plans.
So, best practice is to double check your margins when you start a new cropping year, before adding any cropping or plans!
Uncropped is a crop!
It might sound counterintuitive, but when you see a field marked as ‘uncropped’, that is a cropping status.
This is important, because when we want to update our cropping, we need to select edit cropping, and not new cropping.
This will prevent fields from becoming ‘double cropped’, which would lead to error messages.
Is your cropping information accurate?
In the last module we covered the importance of accurate field information, and the same is true for cropping information.
Target yields and Residue strategies are used by Omnia for nutritional requirement calculations, so while it is easy to use default figures, consider if these are appropriate for your Holding.
Make use of crop descriptions
Crop Descriptions are a powerful tool, which you can set in the cropping information window, and are another way you can organise your Holding.
For example, users often have a description for first wheats and second wheats.
This makes creating different sets of plans for each very simple.
Have you got up to date cropping history?
We always recommend having at least one year of cropping history loaded in to Omnia.
Why? This is another piece of information that Omnia will use to calculate nutritional requirements for crops.
Of course, your history can go back further, but the previous year is the most important.
Fields in Action
In the clip below, taken from the Connected Farming Show, Adam takes us through some of the ways you can use the Fields Module to visualise your Holding.
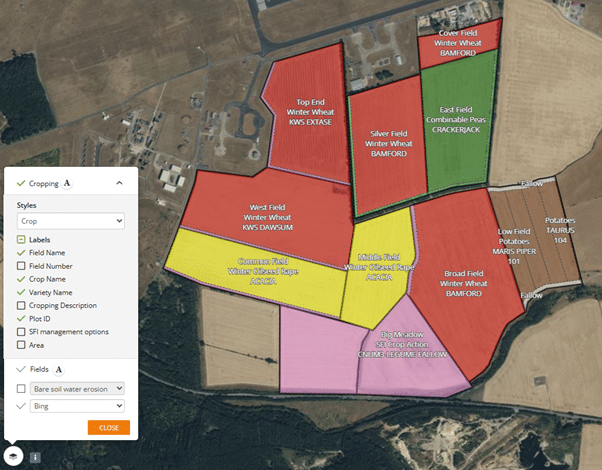
Map Options
In the previous video, we saw a range of different cropping views and background maps – but how do we access these?
The Map Options button can be found in the bottom left corner of the field view, and gives us access to our background maps.
If you are trying to access views such as ‘SFI Management Options’ or ‘Plot ID’, then make sure you click the arrow next to Cropping. This will expand the menu.
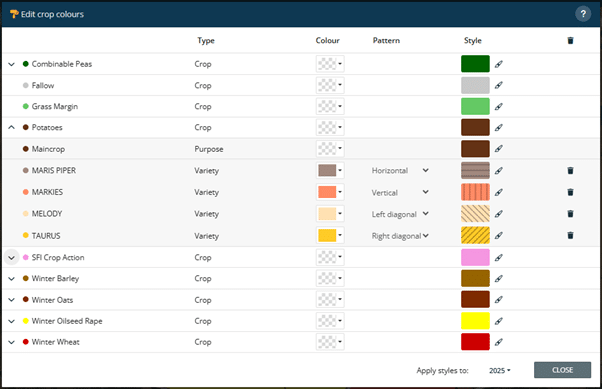
Editing Crop Colours
We also saw Adam demonstrate use of a variety of crop colours, so how do we get access to this?
In the top left corner of the fields module, select the three dots next to ‘Fields’, and then select ‘Edit crop colours’.
This gives you access to a menu, from where you can edit colours and hatchings until satisfied!
Summary: Cropping Information
Thanks for taking the time to learn about cropping information in Omnia.
We hope you now feel just a little more comfortable when it comes to adjusting cropping areas, updating cropping information and colours, and then making full use of map options.
That concludes these two modules on fields and crops – well done.